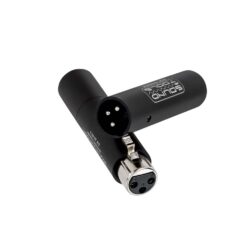
USB-C upgrade kit

In stock

The price includes VAT

54.90

Sound Bullet USB-C upgrade kit

  • USB-C board
  • PCB isolator
  • Rubber spacer
  • Screws with isolating washers
  • Torx screwdriver

PLEASE READ BEFORE YOU BUY

The installation process is delicate and requires manual skill. There are risks involved, and if not done carefully, it could irreversibly damage the battery or other components in your device. Furthermore, we do not hold a license to ship batteries.

Please note that if the device gets damaged during the process, unfortunately, we wouldn’t be able to ship a replacement.

In stock

Follow the instructions in the video below to install the board. With the right care and attention, you’ll be able to complete the update without any issues. However, if you encounter any problems during the process, please don’t force any steps and reach out to us at support@sonnect.com right away. We’re here to help, and we’ll do our best to assist you.

Here’s a recap of key points and tricky steps for the manual upgrade:

  1. Splitting the Battery and Removing Tape Residue: Take your time with this step. Avoid using sharp tools or solvents, as any cuts in the battery can irreversibly damage it. Please note that we (Sonnect) and our dealers do not hold a license for shipping loose batteries in case you need a replacement.
  2. Positioning the New PCB: Do not force it into place. It requires a bit of a knack and a particular angle. Forcing it can result in damage to the two black buttons.
  3. Connecting the Side PCB: Ensure that you align all pins correctly and gently push them together. The main risk here is bending the pins.
  4. Installing the Side Isolator: Again, avoid forcing it. If it feels stiff, gently wiggle the isolator to help it go past the surface mount components.
  5. Final Reassembly of the Bottom Chassis and XLRs: Be careful to ensure that none of the black wires get caught in between gaps, especially between the chassis and the XLR barrel. Wires aren’t meant to be bent around too much.

This kit will upgrade your Sound Bullet with:

  • USB-C charging port
  • automated cable test

Express shipping times:
(once your order has been dispatched)
Europe: 2 working days
America and Canada: 3 working days
Rest of the world: 4 working days

You might also be interested in…

Stripe